Showing posts with label Home Made Love. Show all posts

Wednesday, July 21, 2010

Home Made Love: I Love New York Cheesecake


By MARI and LILA CHILES

For the past four summers, our mommy has sent us to cooking camp at Young Chef’s Academy, where kids learn how to handle themselves in the kitchen, plus get the 411 on some great recipes from all around the country and the world. We’ve learned how to whip up some great dishes, some of which we share in our Home Made Love Family Recipe Book, a cookbook we created at home and often share here on MyBrownBaby. When camp is over, we almost always give mommy a list of ingredients to pick up at Kroger so that we can put to practice what we’ve learned at camp, and mommy usually skips right to the store (hey, if we’re cooking, it means she’s not!).

This summer, we learned how to make some pretty awesome regional dishes from Pennsylvania, New York, Texas, and Chicago. We really loved making the New York-Style Cheesecake, especially since we knew it is one of our Papa Jimy’s favorites. As a special treat for our granddad, we whipped one up on the last night of his summer vacation here at our house—and, of course, mommy pulled out her trusty Nikon D-50 to get all the fun on film. Here, we show you how to whip up a home made cheesecake and decorate the plate so it looks really fancy. You’re going to love it!


I LOVE NEW YORK CHEESECAKE

What You’ll Need:
CRUST
5 TBSP butter, melted
20 square graham crackers, crushed
¼ cup sugar

 
FILLING
4 pkgs. (8 oz. each) cream cheese, softened
1 can (14 oz) sweetened condensed milk
4 egs
1/3 cup all-purpose flour
1 TBSP vanilla extract
 

How To Cook It: 
  1. Preheat oven to 300 degrees
  2. Combine graham crackers, butter and sugar mixing well. Press into the bottom of a spring form pan.
  3. In mixing bowl, beat cream cheese until fluffy
  4. Gradually Beat in the condensed milk, beating until smooth
  5. Add eggs, flour, and vanilla. Beat until well blended. Pour into crust.
  6. Bake for 1 hour 10 minutes, or until slightly browned.
  7. Cool before serving.
  8. Drizzle strawberry syrup or caramel on a plate; arrange a slice on top of it, then top with whipped cream and a strawberry slice or two and enjoy!
 
(Store leftovers in the refrigerator; makes 10 servings.)


post signature

Friday, July 2, 2010

Home Made Love: Strawberry and Cookie Crumble Sundaes


From their Saturday morning bacon, scrambled eggs and biscuit breakfasts to the pans of Gamma Bettye's 11-cheese macaroni and cheese they whip up for our Sunday barbecues, my girls are constantly showing anyone who pulls up a chair at our table that they know their way around a kitchen. I don't mind bragging: They get their training during summer camp at our local Young Chef's Academy of Sandy Springs, and their kitchen intuition from their mama—skills that give Mari and Lila quite a bit of confidence in the kitchen, even at ages 11 and 8 respectively. So when they told us last week that they wanted to whip up a dessert based on a recipe they found in the latest issue of American Girl magazine, I let them have at it. They sent Nick to the store for the ingredients—all we knew was that chocolate, strawberries, vanilla pudding and whipped cream was involved. And in a half hour after dinner last Saturday, they turned this...


Into this...


And it was absolutely delicious!

I promise you that this dessert is easy peasy—simple enough for kids ages 5 and up to make (of course, the little ones will need your help; older kids, ages 11 and up, can handle it on their own so long as you supervise). There is no ice cream involved; each of the sundaes are made pudding and an assortment of dry ingredients layered atop each other to create a colorful dish. Enjoy!

SNOWFLAKE AND STRAWBERRY SHORTCAKE SUNDAES

WHAT YOU NEED:

Pound cake, chopped into 1 inch cubes
1 box of vanilla pudding
crumbled vanilla cookie sandwiches
white chocolate chips
strawberries
whipped cream
strawberry syrup
four sundae dessert bowls or red wine glasses


HOW TO MAKE IT:

Strawberry Shortcake Sundae

1. In the bottom of your dish/glass, layer a handful of pound cake
2. Layer strawberries on top of the cake
3. Spoon vanilla pudding atop the cake and strawberries
4. Top with whipped cream and strawberry syrup

(Note: For a super sweet twist, Mari and Lila added chocolate kisses to my Strawberry Shortcake Sundae.)

Cookie Crumble Sundae

1. In the bottom of your dish/glass, layer a handful of pound cake
2. Spoon vanilla pudding atop the cake
3. Layer cookie crumbles atop the mixture
4. Top with whipped cream and vanilla chocolate chips

Makes four servings.

post signature

Friday, January 15, 2010

Home Made Love: Roast Lemon and Rosemary Chicken


By MARI and LILA CHILES

Mommy’s specialty is friend chicken—it’s always perfectly crunchy on the outside and nice and juicy on the inside. But we can’t eat it all the time because it’s not really all that good for you. That doesn’t mean we can’t enjoy good chicken, though. Mommy lets us help her make a different kind of chicken that’s roasted in the oven with lemon and rosemary, and next to her fried chicken, it’s the best chicken we’ve ever had. Plus, it’s healthier, which means we can eat it more often.

At first we thought the lemon was going to be a little weird, but it’s actually really tasty, and it makes a nice salty, tarty juice in the pan that we like to spoon onto our chicken when it’s time to eat it. And Lila really likes the taste of the fresh rosemary, which, during the summer, we pull right from our herb container garden out on our deck. (Now that it’s winter, we buy fresh rosemary from the store, but it still tastes really good!) Mommy usually serves this chicken with roasted red potatoes that she flavors with rock salt, a little olive oil, and more fresh rosemary, and a nice garden salad with extra cucumbers (because Lila really likes cucumbers!). Trust us: You’re going to love this recipe!


ROAST LEMON AND ROSEMARY CHICKEN


What you’ll need:

salt
pepper
garlic powder
3 chicken halves
3 lemons, halved
6 rosemary sprigs
6 garlic cloves, peeled
aluminum foil
a roasting pan


How to make it:

1. Preheat oven at 350 degrees.

2. Generously season the chicken halves with salt, pepper, and garlic powder.

3. Place the chicken halves in a roasting pan side by side.

4. Cut up three lemons into halves, and place them around the chicken. (You do not have to squeeze them; the juices will cook out of the lemons and flavor the chicken.)

5. Add fresh, whole, peeled garlic cloves.

6. Put fresh rosemary sprigs on top of the chicken halves.

7. Cover with foil, and put the pan into the preheated oven.

8. Let it cook for about 45 minutes; baste the chicken with the juices from the pan every once in a while to keep it from drying out.

9. After 45 minutes, take off the foil and let the chicken halves brown, for about 15 to 20 minutes. If you get reasonably small halves, not those BIG ole pieces that look like they got shot with steroids, it should take about an hour or so for the chicken to be cooked through. If you can only find thick halves, or you decide to cook the chicken whole instead of in halves, you should let it cook under the foil an extra 15 minutes or so before you take it off.

Serves four generously.

From the MyBrownBaby series, "Home Made Love: From The Chiles Girls' Kitchen To Yours," the cookbook in which Mari and Lila share special memories behind the beloved dishes they create in our house.


post signature

Friday, November 13, 2009

Home Made Love: Mari's Chocolate Sticky Bread


By MARI CHILES

To start this off I just want to say that CHOCOLATE STICKY BREAD IS THE BEST DESSERT EVER! Just trust me: once you taste it, you will agree with me, and you will tell everyone that you know that it's your favorite.

I first learned this recipe at this awesome summer cooking camp [my mom has probably written about it] called Young Chefs Academy. We get half of our dinner, lunch, and dessert dishes from that place! This recipe is one of them.

Now I bet that at least one of the many people reading this is thinking, "Well, what if I don’t want chocolate in my bread?" There is a solution for that. I just replace the Hershey kisses with small apple slices. Easy as that! And if you don’t want the apples either, then there are, like, a billion other things that you could substitute for the filling! Peaches. Pears. Bananas with cinnamon. Name it, put it in.

Mommy, my sister Lila and I make this for special occasions, but sometimes we make it for no reason on Monday nights! If you could make a dessert this delicious on a Monday night then you know that it is extremely easy to make.

Now that you have heard this and your mouth is watering and you suddenly have this weird craving for biscuits and chocolate—or apples, the way I like it!—you probably want to know the recipe. Well you’re in luck, because I've written it out for you. Here it is (adapted from the Young Chef's Academy of Sandy Springs, GA):

What You'll Need:
*4 cans of refrigerated biscuits
*3/4 cup of sugar
*1 tablespoon of Hershey’s cocoa
*1 teaspoon of ground cinnamon
*1/2 cup of margarine, melted, divided
*1/2 cup of light brown sugar
*1/4 cup of water
*80 Hershey kisses, unwrapped [optional]; can replace with small apple slices from three apples.

How To Make It:
1. Stir together cinnamon, cocoa, and sugar in a small bowl.
2. In one microwave-safe bowl, whisk together ¼ of the margarine, the brown sugar, and the water. Heat in the microwave on high for 30 to 60 seconds until the mixture is smooth when stirred.
3. Divide the mixture into two and pour each half into two loaf pans.
4. Preheat the oven to 350 degrees.
5. Cut each of the biscuits in half. Slightly flatten and wrap around one kiss to make a ball. Keep repeating this until all the biscuits are gone.
6. Dip each ball in the remaining ¼ cup of margarine then roll in the cocoa-sugar mixture. Put half of the balls in each pan with the margarine-sugar mixture.
7. Bake for 40 minutes or until golden brown. Cool for 20 minutes in the pan then convert to a serving plate. This recipe makes 12 servings. Eat up and enjoy!


post signature

Friday, September 25, 2009

Home Made Love: Nick's Easy Like Sunday Morning French Toast


My baby is the grill master, okay? Ribs, chicken, fish, vegetables, Cocoa Puffs—whatever Nick cooks over charcoal always comes to our dinner table perfectly crisp, insanely juicy, and super flavorful. I mean, The. Boy. Is. Bad. (And plus, everything tastes better with a little smoke on it, and definitely when someone else is cookin'—I'm just sayin'.)

But dig it: Nick also has quite the special gift when it comes to breakfast foods, too. Home made waffles, bacon, grits, biscuits—when your boy wakes up and starts knocking around pots, pans, and the waffle iron? Right—everybody in the house gets really emotional. There's lots of fist pumping and jumping around and stuff, and when he calls us all down to the breakfast table, we do lots of happy dancing. We put our backs in it when he whips up his Early Sunday Morning French Toast, which is, in a word, amazing. Usually, he holes himself up in a corner of the kitchen, next to the spice cabinet, and, like some evil scientist, tosses together a potion of cinnamony, sugary goodness to dip bread into before he splashes it in a hot pan full of butter. Ha' Mercy. But Nick very generously figured out his Early Sunday Morning French Toast recipe so that I could share it with you. *Inserting pictures of you doing the happy dance here!*

Nick's Easy Like Sunday Morning French Toast

Ingredients

6 slices bread
2 eggs
2/3 cup milk
1/4 teaspoon ground cinnamon
1/4 teaspoon gttround nutmeg (optional)
1 teaspoon vanilla extract
1 teaspoon sugar
sprinkle of salt

Directions

Beat together egg, milk, salt, desired spices and vanilla.
Heat a lightly oiled griddle of skillet over medium-high flame.
Dunk each slice of bread in egg mixture, soaking both sides. Place in pan, and cook on both sides until golden. Serve hot.

About three servings.


post signature

Monday, September 21, 2009

Finding Great Joy In Gamma's Home Cooking


I don’t know that my mom loved to cook as much as she dug the reactions she got from her standout meals. A daughter of the South, Bettye was renowned for her southern dishes, and her macaroni and cheese was the stuff of legend. People heard she was whipping up a pan, and they’d get into car accidents and break stuff and whatnot trying to get in line for a heaping serving before it was all gone. It wasn’t an easy dish to make back then; the grocery stores didn’t have those glorious pre-shredded bags of cheese, so she had to scrape countless blocks of sharp and mild cheddar over her beat-up hand-held shredder to get the right amount of cheese she needed for ginormous pans of mac and cheese, which should explain why she wasn’t a fan of the cooking part.

As a kid, I didn’t quite get my mom’s foot dragging in the kitchen; I’d beg her to let me help, and on the days when she’d hand over a block of cheese for me to shred, I’d handle it with great glee. I loved helping out in the kitchen! But as a mom charged with cooking three squares for a family of five most days of the week, I kinda get it now. After the writing and the chores and the homework help and the after-school activities, I barely want to think through what to cook, let alone stand over a hot stove. It’s plain exhausting.

Which is why I’m training my girls how to handle themselves in the kitchen. Oh, it’s not a game: I’ve had Mari and Lila cracking eggs, seasoning chicken, slicing fruit (with kid-friendly knives), and buttering biscuits practically from the moment they were able to walk themselves into the kitchen.

CLICK HERE TO READ THE REST ON MY NEW BLOG ON PARENTING.COM'S THE PARENTING POST.


post signature

Thursday, June 18, 2009

Home Made Love: Of Course We Could Eat Possum, But Nachos and Pizza Will Do Just Fine


Okay, so I know I’ve been whining about this big family camping trip and I haven’t been all sporty about it. Blame it on the bugs. But there are a few bright spots I’m looking forward to: the looks on my daughters’ faces when we pitch the tent REI is donating to the cause, and make s’mores by the campfire; sipping adult beverages with my friends and talking smack under the stars; letting Lila fall asleep cuddled against me (I know doggone well she’s not going to close her eyes in her own sleeping bag). And especially cooking on the open fire.

Now mind you, I’m nice on the grill (second only to the grill master confaster, Nick), but there’s a difference between making barbeque over hot coals and burning on the flames of a campfire. I don’t really get down with fire like that, so, um, this might be a little tricky. But I look forward to the challenge. Plus, my dear friend Jennifer Fox, owner of the Young Chef’s Academy in Sandy Springs hooked us up with some recipes she featured in a special week-long summer class on campfire cooking. We’re going light with breakfast and lunch—cereal and sandwiches will get us through for those meals. But dinner is going to be communal, and each of our families will be contributing something delicious to the campfire pots. Here are a few of Jennifer’s recipes that I think I’ll try out:


UPSIDE DOWN NACHOS

Ingredients:

• 2 cups grated cheese
• 1 bag tortilla chips
• 1 jar salsa
• 1 chopped onion
• 1 can chopped jalapenos
• 1 small container of sour cream


To Cook:

• On a square of aluminum foil place a layer of cheese, then onions, jalapenos, salsa, and finally a mound of chips.
• Make a pouch with foil and place it on the campfire. Cook for three to five minutes, or until you hear the cheese sizzling.
• Remove from the fire and open the pouch. Place a plate upside down on the chips and flip the whole thing over, so that the chips and cheese are on the plate; top with sour cream.


CAMPFIRE PIZZA

Ingredients:

• 1 package flour tortillas (8)
• 1 jar spaghetti sauce
• Pepperoni
• Shredded mozzarella cheese

To Cook:

• Place tortilla on griddle then top with sauce, cheese, and toppings.
• Turn an aluminum pan over the top of the pizza to trap heat. Cook until cheese is melted.


BANANA BOATS

Ingredients:

• Bananas with peels on
• Mini chocolate chips
• Mini marshmallows

To Cook:


• Slice a small trough along the length of the banana.
• Peel back the flap, being careful to leave one end still attached to the banana. Remove the fruit that was cut out.
• Sprinkle mini-chocolate chips into the length of the trough, then top with mini-marshmallows.
• Fold the flap over the trough and wrap in aluminum foil.
• Place your banana on the fire for a few minutes, long enough for the chocolate chips to melt.
• Remove from the fire, pull back the flap, and enjoy with a spoon

These recipes are a part of the MyBrownBaby series, "Home Made Love: From The Chiles Girls' Kitchen To Yours," the cookbook in which Mari and Lila share special memories behind the beloved dishes they create in our house. The girls and I will try these recipes during our camping trip, and then include them in the book.

This Home Made Love series is sponsored by The Young Chef's Academy of Sandy Springs, GA, a cooking school for children. Learning food preparation skills is the main ingredient at YCA, and each class adds a heap of kitchen safety, a scoop of etiquette, a handful of table setting, a pinch of menu planning, and laughter to taste. To find out about classes, summer camps, and more at The Young Chef's Academy of Sandy Springs, click HERE.


post signature

Friday, May 29, 2009

Home Made Love: Screamin' Mean Collard Greens


When Mommy was growing up, collard greens were usually made for special occasions—like big Sunday dinners when company was coming over, or on Thanksgiving, Christmas, or New Year’s, when black folks ate them for good luck with their money for the coming year. Mommy thinks people didn’t make them a lot because you had to find fresh collards in the grocery store, and then soak them in the sink to get the grit (that’s southern for “dirt”) off the leaves, roll them, cut them into thin strips, then soak them some more to make sure they were absolutely, totally, positively clean. That was hard work—who wanted to do all of that for a meal on a Thursday night?! These days, though, collard greens come in bags, already clean and cut; you just pour them into a pot and a few hours later—voila!—you have a delicious, steaming, heaping pot full of one of the most delicious veggies ever. Now, our mommy makes them all the time, no matter the day—and we enjoy them, too. We especially love them with fried chicken. But they taste best when Mommy puts a few spoonfuls in a bowl with pieces of turkey meat, right out of the pot. They're just not right without hot sauce, so make sure you have a bottle on hand to put out with a great big ol’ heapin’ serving of these greens. Simply dee-vine.

What You’ll Need:

1 bag of collard greens
2 smoked turkey legs
1 small can of chicken stock
1 tbsp hot pepper flakes
1 tbsp black pepper
1 tbsp cumin
1 tbsp garlic powder
1 tsp salt
1 tsp Lawry’s seasoning salt

To Cook:

1. In a large pot, cover turkey legs with water and boil at least 40 minutes, until meat gets a bit tender. If the water boils down, add more.
2. After 40 minutes, add half of the bag of greens to the pot.
3. Add half of each of the seasoning to the top of the greens in the pot.
4. Layer the second half of the bag into the pot, and put in the rest of the seasonings.
5. Add chicken stock.
6. Cover and let simmer on medium until greens are tender; taste to adjust seasonings. The greens should be ready in about 2 ½ hours.

This recipe is from the MyBrownBaby series, "Home Made Love: From The Chiles Girls' Kitchen To Yours," the cookbook in which Mari and Lila share special memories behind the beloved dishes they create in our house.

This Home Made Love series is sponsored by The Young Chef's Academy of Sandy Springs, GA, a cooking school for children. Learning food preparation skills is the main ingredient at YCA, and each class adds a heap of kitchen safety, a scoop of etiquette, a handful of table setting, a pinch of menu planning, and laughter to taste. To find out about classes, summer camps, and more at The Young Chef's Academy of Sandy Springs, click HERE.


post signature

Friday, May 15, 2009

Home Made Love: Peanut Butter Kiss Cookies


We like peanut butter cookies but we love them with the sweet sugary chocolate on the top. We like to lick the kisses off when the peanut butter cookies are still warm--it looks like a regular chocolate kiss, but when you put it to your tongue, it's all warm melty chocolate. We gave these cookies to Santa Claus and he really liked them. He ate three out of the four cookies. Of course, he only had four cookies because we, along with our cousins Miles and Cole, and our next door neighbor Cheyenne, ate about 30 of the cookies all by ourselves before Mommy rescued the four for Santa.


Now that it's summer time, we can eat ALL of the cookies without worry. Maybe we'll eat them out on the back deck on a hot, sunny day, with a nice, tall glass of freezy cold milk. YUM!


Ingredients:

1 pouch (1 lb 1.5 oz) Betty Crocker® peanut butter cookie mix
3 tablespoons vegetable oil
1 tablespoon water
1 egg
1 package Hershey's kisses

Directions:

1. Combine ingredients.
2. Use a melon scoop to create balls of cookie dough.
3. Bake on cookie sheet at 350 degrees for about 10 minutes (you'll have to do about three batches).
4. Top each cookie with a chocolate kiss as soon as you remove a batch from the oven.

Makes about 40 cookies.

ENJOY!!!


This recipe is from the MyBrownBaby series, "Home Made Love: From The Chiles Girls' Kitchen To Yours," the cookbook in which Mari and Lila share special memories behind the beloved dishes they create in our house.

This Home Made Love series is sponsored by The Young Chef's Academy of Sandy Springs, GA, a cooking school for children. Learning food preparation skills is the main ingredient at YCA, and each class adds a heap of kitchen safety, a scoop of etiquette, a handful of table setting, a pinch of menu planning, and laughter to taste. To find out about classes, summer camps, and more at The Young Chef's Academy of Sandy Springs, click HERE.


post signature

Friday, May 1, 2009

Home Made Love: Super Blasting Banana Pudding


By MARI and LILA CHILES

This has to be the easiest, yummiest dessert to make, like, ever! The vanilla pudding smells so good while it’s cooking on the stove, you’ll want to scoop it into a big bowl and eat it all by itself. But when you add the vanilla wafers and the bananas, it gets even better. Imagine that! We love it warm, but it tastes just as good after it’s been refrigerated for a day, when the wafers are soft (but not soggy!) and the bananas have settled into the pudding. If Mommy’s in a good mood, she lets us have it for lunch—which, of course, makes it taste even better. One bowl is never enough!

Ingredients

5 ½ Tbsp. all purpose flower
1 pinch of salt
2 cups milk
7 oz. sweetened condensed milk
2 large egg yolks
½ Tbsp. vanilla extract
3 large bananas sliced
30 vanilla wafers
4 large egg whites, at room temperature
¼ cup sugar


Directions

1. Combine the flour and pinch of salt in a saucepan. Heat on medium on the stove and add the milk, condensed milk, and egg yolks, stirring constantly until thickened. Remove from the heat and add the vanilla. Put a piece of plastic wrap over the custard to prevent a thick skin from forming. Let custard briefly cool.
2. Slice bananas and arrange half of the slices on the baking dish. Top with 15 vanilla wafers and then smooth half of the custard mixture on top. Repeat with remaining bananas, wafers, and custard.
3. Preheat oven to 325 degrees.
4.Beat egg whites in mixing bowl until foamy. Slowly add sugar to the egg whites while still beating the eggs. Continue to beat until soft peaks are formed. Spread the meringue over the pudding mixture, making sure to seal the edges.
5. Bake until the meringue is brown on top, 5-8 minutes. Cool for 30 minutes, and then chill before serving.

Makes 12 servings.


This recipe is from the MyBrownBaby series, "Home Made Love: From The Chiles Girls' Kitchen To Yours," the cookbook in which Mari and Lila share special memories behind the beloved dishes they create in our house.

This Home Made Love series is sponsored by The Young Chef's Academy of Sandy Springs, GA, a cooking school for children. Learning food preparation skills is the main ingredient at YCA, and each class adds a heap of kitchen safety, a scoop of etiquette, a handful of table setting, a pinch of menu planning, and laughter to taste. To find out about classes, summer camps, and more at The Young Chef's Academy of Sandy Springs, click HERE.


post signature

Friday, April 17, 2009

Home Made Love: Basil Sausage Peppery Pasta


By MARI and LILA CHILES

We have some pretty busy days around here, and some evenings, when soccer and Mandarin lessons and Environmental Club, and Math Enrichment clog up our schedule, we help Mommy hook up something quick and healthy and delicious so that we can make it to our activities on time or we don’t have a lot to fuss with if we eat dinner afterward. The best part about this dish is that we get to make the sauce from scratch, and peel the sausage all by ourselves. (Who knew you could peel sausage?!) And considering how easy it is to make, it sure tastes yummy!

Ingredients
4 cloves garlic, chopped
1 onion, diced
6 plum tomatoes, diced
6 basil leaves, chopped into strips
2 tbsp olive oil
1 package of sweet sausage (we use Johnsonville), cases removed
½ tsp red pepper flakes
½ tsp fennel seeds
½ tsp garlic powder
1 cup white cooking wine
½ cup heavy whipping cream
salt and pepper to taste


Directions
1. Brown the sausage bits and fennel seeds in a large sauté pan with the olive oil; set aside.
2. Sauté garlic, onion, and red pepper flakes in the pan drippings until translucent, about 5 minutes.
3. Gently add in tomatoes, garlic powder, salt and pepper, and sauté.
4. Add sausage back to the pan; pour in white wine and heavy whipping cream; gently stir all ingredients until incorporated.
5. Add in basil; let sauce simmer for about 10 minutes, until tomatoes break down into sauce.

Serve on top of penne; garnish with fresh basil leaves. Pair with a nice crusty, buttery bread. Mommy makes us eat this with salad. We're okay with this. Well, kinda. We like the sausage sauce and bread much better.

Serves 6.

This recipe is from the MyBrownBaby series, "Home Made Love: From The Chiles Girls' Kitchen To Yours," the cookbook in which Mari and Lila share special memories behind the beloved dishes they create in our house.

This Home Made Love series is sponsored by The Young Chef's Academy of Sandy Springs, GA, a cooking school for children. Learning food preparation skills is the main ingredient at YCA, and each class adds a heap of kitchen safety, a scoop of etiquette, a handful of table setting, a pinch of menu planning, and laughter to taste. To find out about classes, summer camps, and more at The Young Chef's Academy of Sandy Springs, click HERE.


post signature

Thursday, March 19, 2009

Home Made Love: Gamma Bettye's Shush Cake


By MARI and LILA CHILES

This is our Gamma Bettye's recipe for her Southern Lemon Pound Cake. It's thick and delicious and full of lemony goodness! Here’s the thing, though: You have to be very quiet when you’re making this cake so that it won’t fall and be flat when it’s finished cooking. Flat cake is not cute. It's still tasty. But not cute. And when we say you have to be quiet, we mean really quiet. Mommy won’t even let us open the refrigerator when this cake is cooking—that’s how quiet it has to be. If you can’t handle this, we suggest that you go out and play now.


Here are some things we like to play when we’re making shush cake: We like to play on the swing set and climb in trees; we like to play on our scooters; we like to play hide-and-go-seek; we like to play soccer and football and basketball; we like to ride our bikes, and; we love to write on the driveway with chalk.


Oh, and we take our dog Teddy with us so he can be quiet, too.


This pound cake is really easy to make, and the best part is that Mommy lets us lick the bowl after she pours the batter in the round cake pan. Quietly? That's the best part. The cooked cake is really perfect for a special dessert for Thanksgiving or Christmas, but you don’t need to eat it just on special occasions—having it on a Wednesday night is just fine, too, especially with a bowl of vanilla ice cream.

Ingredients:
3 sticks butter
1 stick margarine
2 cups sugar
3 cups flour
6 eggs
½ cup milk
1 tsp baking powder
pinch of salt
2 tsp lemon extract
No-stick spray with flour
(Note: You’ll also need a round cake pan with a tube in the middle.)

Directions:
Use the mixer to mix all the ingredients together in the order given; spray a round cake pan with the no-stick flour spray, then spoon the batter into the cake pan. Bake at 325 degrees for 1 hour and 25 minutes.


post signature

Friday, February 27, 2009

Home Made Love: Crazy Crabby Crab Cakes


By MARI CHILES and LILA CHILES

Mommy usually makes these on special occasions, which makes them, well, special (and expensive). She lets us crack the eggs and stir in the seasonings, and even pat them into these cute little cakes. If we’re having a small party with a handful of people, you can bet the crab cakes will be on the table, with a nice salad and some parmesan cous cous. Once she even made them for a Super Bowl party, but instead of serving them plain, she put them on toasted bread with slices of Gouda or swiss cheese melted on top and a little mayonnaise seasoned with Old Bay, fresh dill, spicy mustard, and pepper. It was so crablicious!

Ingredients:
4 cloves garlic, chopped
½ red pepper, chopped
½ onion, chopped
2 tbsp olive oil
2 cans lump crabmeat
1 egg
2 tbsp mayonnaise
3 tbsp Grey Poupon mustard
3 tbsp chopped fresh dill
2 tsp Old Bay seasoning
1 tsp black pepper
a few dashes of Cayenne pepper
a few dashes of Worcestershire sauce
Breadcrumbs to bread crab cakes
butter


Directions:
1. In a small sauté pan, sauté garlic, red pepper, and onion in olive oil until translucent, about 5 minutes; set aside to cool.
2. Shred the crabmeat with fingers to reduce lumps.
3. Put all the ingredients, save for the breadcrumbs, in a large mixing bowl; gently fold them together so that all seasoning is incorporated.
4. Scoop fist-sized amounts of the mixture into your hand and form into flat crab cakes (about 8)
5. Gently coat with breadcrumbs; if you have time, cool them in the refrigerator for one to three hours to let them set.
6. Melt some butter in a large sauté pan; once the butter is bubbling, add crab cakes; cook on both sides until golden brown.

Makes 8-10 crab cakes.

From the new MyBrownBaby series, "Home Made Love: From The Chiles Girls' Kitchen To Yours," the cookbook in which Mari and Lila share special memories behind the beloved dishes they create in our house.


post signature

Friday, February 6, 2009

Home Made Love: Philadelphia Cheesesteak Sandwiches


To keep Christmas gift-giving simple (and affordable!), my girls and I made home made cookbooks for a few of the special folks in our lives. They turned out pretty cute, too--they were filled with my daughters' step-by-step, easy-to-follow recipes, pictures of the two of them slaving over the stove, and, of course, colorful shots of their creations looking all delicious on the plate. My favorite part of our "Home Made Love: From The Chiles Girls' Kitchen To Yours" cook book, though, was the stories; I encouraged Mari and Lila to write about the food they were cooking--to share the special memories behind the beloved dishes they chose for their project. Cooking, after all, is about memories, isn't it?

And because I'm so very proud of the girls and their "Home Made Love," I've decided to start a series called Home Made Love, in which I'll feature their recipes and memories. Here, the first in the series:


By MARI CHILES and LILA CHILES


CHAMPION CHEESESTEAK SANDWICH

These sandwiches are nice and cheesy and we really love the onions, especially when they’re sizzling in the pan. When mommy cuts up the roast beef—we get it sliced thin from the grocery store—Teddy always sits right up under her feet, waiting for a piece or two to drop his way. Teddy loves roast beef. We always manage to “accidentally” drop a few more pieces his way when Mommy’s not looking. That makes Teddy especially happy.


Plus, it keeps him from nudging mommy on the leg for more meat. Mommy loves her Teddy, but she’s not a fan of the wet-nosed nudge. She does like the cheese steak sandwiches, though, which we serve with tater tots and fruit salad.


Mommy says our sandwiches taste just as good as the Philadelphia cheese steak sandwiches she used to get when she visited Philly. That was before we were born, so we haven’t tasted those. But it would be cool to visit Philly one day and try one for ourselves. One of these days, we will. In the meanwhile, we’ll have a little taste of Philly at our dinner table.

Ingredients

2 medium onions cut length-wise in half, then sliced cross-wise into thin slices
1 tbsp of olive oil
1 ½ pounds of cooked roast beef, thinly sliced and cut into strips
6 hoagie buns, about 6 inches long
butter
6 slices of American cheese

Directions

• Sauté onion in oil about 5 minutes, stirring frequently until tender.
• Stir in beef, and heat through.
• Set oven to broil; split buns and place cut-side up on cookie sheet; brush each of the faces of the bread with butter and broil 4-5 inches from the heat for 2 minutes.
• Divide beef mixture among the rolls and top with cheese; broil about one minute, until cheese is melted.

Makes 6 sandwiches.


post signature

Friday, December 12, 2008

Mommy's Marvelous Macaroni & Cheese


By DENENE MILLNER
It seemed almost every weekend when I was little, my mom was taking us somewhere to visit with her best friends/church buddies/play sisters. While the kids splashed around in the pool or conjured up fantastic adventures in the basement, Mommy and her girlfriends played Pokeno for pennies and talked about church. Bible-thumpers they were, indeed.

A huge part of those get-togethers, of course, was the eating. My Auntie Tina always brought this butter pound cake that was so juicy and spongy it practically melted between your fingertips. My Auntie Sarah always had fried chicken and mustard greens on the stove, hot and sweet. Auntie Ragland's specialty was black-eyed peas and, if we happened to be at her house on New Year's, chitlins (she was one of the rare women in my mom's life trusted enough to clean them properly). And my mom? A party wasn't a party unless Bettye brought her famous macaroni and cheese, juicy and moist on the inside, a skooch crispy on top. Nobody, and I mean nobody, could touch my mother's famed mac & cheese recipe. I mean, a few tried and all--would show up to Sunday dinners at St. John's Baptist Church with their pitiful offerings. Alas, they were feeble, sorry attempts that could never compare to the delicacy my mother always seemed to whip up faster than you could say, "Let's eat!"

I grew up watching my mother make her mac and cheese--started pitching in when I was nimble enough to grate the huge blocks of sharp cheddar cheese on her beat up grater. A few Thanksgivings before she passed away, I convinced her to give me lessons on some of her most prized recipes; she taught me how to make her homemade stuffing, her sweet potato pie, her southern lemon pound cake, the potato salad, and, the mother of all her recipes, THE mac & cheese. It took me quite some time and a lot of practice to get it to taste like hers, but now my mac & cheese so closely resembles my mom's that my dad is finally convinced I know what I'm doing. This is huge.

During my years of making the mac & cheese, I've added my own twist to it; I don't grate anymore, now that Kroger and Publix have those handy bags of cheese already shredded. And while my mom used only three cheeses--sharp, mild, and American--I use up to 11 in my recipe, including asiago, monterey jack, mozzarella, parmesan, romano, and gouda, among others.

This macaroni and cheese is simply sumptuous—the secret is in the roux. Remember to take your time with the egg, butter, milk and flour mixture; get that right, and this will be the juiciest, cheesiest, yummiest macaroni and cheese you’ve ever tasted! Don’t forget to credit Bettye Millner, my beautiful mom.

For a 9 by 11-inch pan you'll need:

1 ½ small boxes of Mueller's macaroni elbows
4 eggs
2 cups of milk
2 bags of sharp cheddar cheese
2 bags of mild cheddar cheese
4 slices American white and yellow cheese
2 bags of assorted cheeses (like italian six cheese,
monterrey jack cheese, or mexican cheese)
1 stick of butter
about 3 tablespoons of flour
salt and pepper to taste

To cook:

1. Boil your macaroni until tender (put a little oil in the water so the elbows don't stick.

2. Drain the macaroni, then put a layer of macaroni on the bottom of your pan. Then layer the cheese, then macaroni, then cheese. End with cheese.

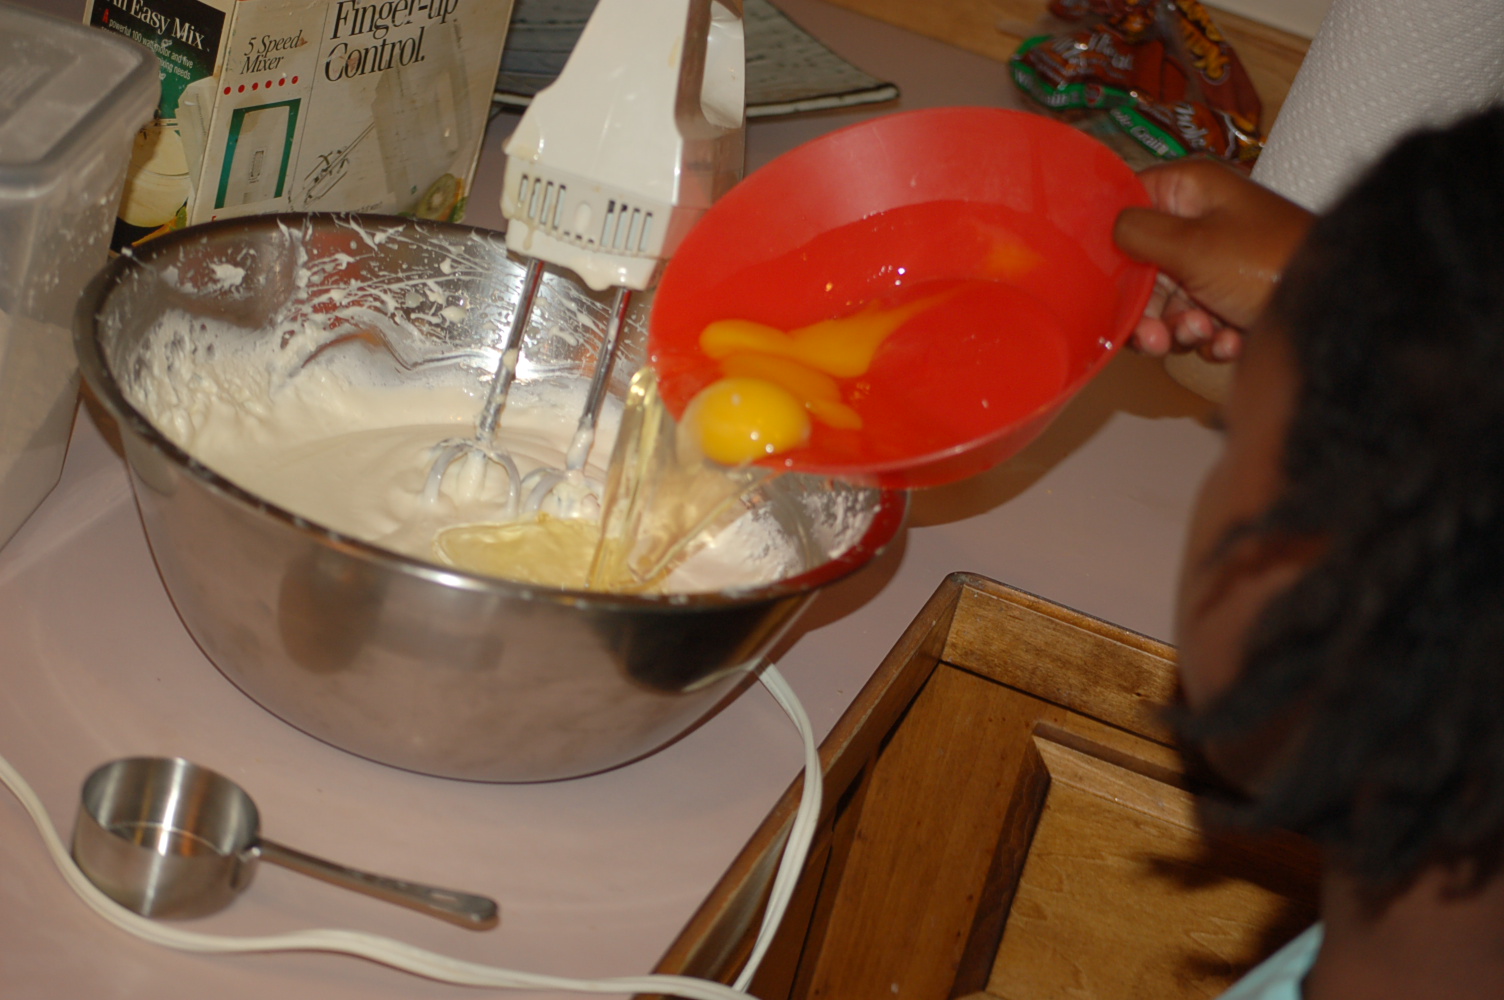
3. Melt your butter in a pan on medium heat. While the butter is melting, mix your eggs in a large bowl, breaking the yolks. Add milk to the eggs, and put in a little salt and pepper to season; stir until it's all mixed together.

4. After butter is melted, add the flour to the butter and mix so that the flour dissolves into the butter. It'll be liquidy.

5. Pour in milk and egg mixture into the butter and flour mixture in the pan; whisk it until all of it is mixed together and the liquid gets a little thick. DO NOT LET IT GET SUPER THICK OR ELSE IT WON'T DRIP BETWEEN THE LAYERS.

6. Pour the egg/butter/milk mixture into the macaroni and cheese layers; the liquid should reach the top, but do not let it flood the top of the pan.

7. Cover pan with aluminum foil, and bake at 350 for about 40 minutes to an hour. You'll know it's close to finished when it's bubbling. When it starts to bubble, take the aluminum foil off so that it can brown.

Don't forget that today is the last day for the Lucky Paperie stationery give-away. Click here to enter and find out how you can up your chances to win!


post signature

Related Posts Widget for Blogs by LinkWithin

wibiya widget